Highly prized by knowledgeable collectors, including Marie-Antoinette, Japanese lacquerware is renowned for its glossy shine and intricate designs, often rendered in gold. Since the Jomon period (ca. 14,000–300 B.C.), Japanese artisans have been using urushi lacquer to transform common objects into works of art. At L’École des Arts Joailliers, the Van Cleef & Arpels school for jewelry enthusiasts, you can, too.
When the Paris-based institution swept into Manhattan this fall for two weeks of tutorials on the art and science of fine jewelry-making, I seized the chance to sit in on its Japanese lacquer workshop and create a piece of my own.

A bit of background here. Urushi lacquer is derived from the sap of the urushi tree, also called a poison oak or lacquer tree. It contains urushiol, the same compound found in poison ivy, making it dangerous to work with in its liquid state. Several coats of lacquer are required to achieve the desired luminous shine, and each coat takes days to dry, meaning the process is labor-intensive and time-consuming, as well.
But when dry, lacquer is safe and resistant to water, acid, heat and, most importantly, germs. In the ancient world, this made it ideal for bowls and serveware, but as the art form evolved, it also began to grace furniture, decorative objects and jewelry, particularly during the Edo period (1603–1868).
My two-hour class was led by art historian Cécile Lugand and lacquer expert Franck Cengizalp. Lugand explained that we’d practice three techniques important to Japanese lacquer: maki-e (literally translated as “sprinkled picture,” it’s the use of gold or silver powder to create a design), color application and shell mosaic. Then Cengizalp took over to guide us through the steps of creating our own tiny masterpieces.
Outlining the Design

Because of the time constraints, each student was handed a butterfly pendant that had already received five coats of black lacquer. Our first step was to create a personal design and transfer the pattern to the pendant.
Using paper and pencil, I drew a simple design and then traced the sketch on washi paper with a paintbrush and a white chalky pigment called gofun. Next, by positioning the paper chalk-side-down on top of the pendant and using firm, smooth strokes with a stiff brush called a hake, I gently pressed a ghost image of my drawing onto the lacquer butterfly.
A Sprinkling of Gold
With the next step, maki-e, our butterflies began to truly look like jewels. After painting the tip of one wing with lacquer to create a sticky surface, I picked up my funzutsu — a bamboo tube fitted with mesh at one end to evenly distribute gold or silver powder — and lightly scratched the tube to shake gold dust over the wet lacquer. After a moment, Cengizalp cleared the excess away with a soft brush, leaving a solid field of glimmering gold.
Lush Color
Once the powder was applied, we filled in our designs with color. Though natural lacquer is a translucent brown, pigments are added to create an artist’s palette of colors. Carefully following my chalk outline, I painted a swath of red lacquer across both wings. Although I went for an abstract design, Cengizalp deftly demonstrated how additional colors like blue, white and green could be used to create flowers and other motifs often seen in traditional urushi.
Iridescent Touches
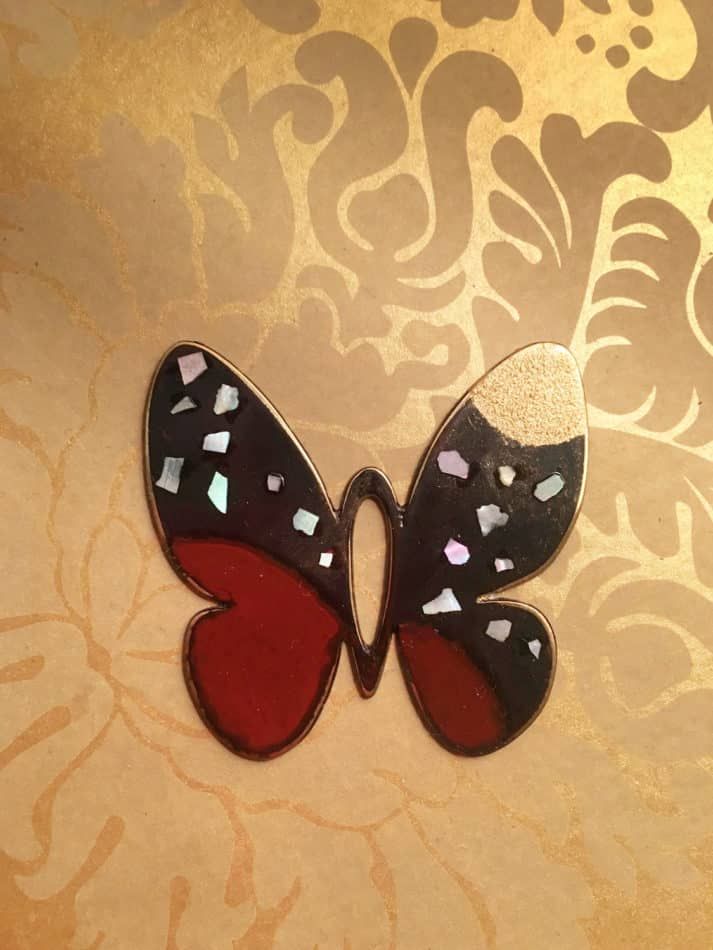
We completed our pictures by adding flakes of mother-of-pearl, again using the lacquer as an adhesive. After dotting the lacquer where I wanted the bits of shell, I used the pointy end of a wooden stick moistened with water to pick up individual flakes and secure them in place.
As Cengizalp and Lugand came around to slide our fresh creations into jewelers’ boxes, they advised us to leave them in the bathroom to dry. Counterintuitively, lacquer dries best in warm, humid surroundings. As it sets, it pulls moisture from the air, which maintains its glossy finish.
Even though my butterfly pendant may not appear around my neck anytime soon (my apprenticeship has a long way to go), the experience left all of us students with a deep appreciation of the creativity, patience and skill necessary to master these techniques, as well as a sharper eye for exceptional urushi artisanship.