Creating a wall of art is a wonderful way to enhance your space, showcase beautiful pieces and tie an interior design together. It allows you to evoke emotions in a room while also showing off your tastes and interests.
However, arranging artworks on a blank wall can be daunting.
That’s why we created this guide. Below, we show you, step by step, how to arrange wall art in different ways to maximize your wall space, including specific tips for designing a gallery wall.
With these pointers, you can deploy your art to have the greatest impact in your space, personalizing it in the most beautiful way.
1. Choose Your Wall
First, decide where you want to hang your artworks. Should you go for the obvious large wall or smaller spaces?
Large walls need to be filled. Small pieces on an expansive surface can look lost and isolated, so don’t be afraid to go big with one sizable work. Another good option is to create a grouping of pieces, and a spacious wall allows you to spread them out.
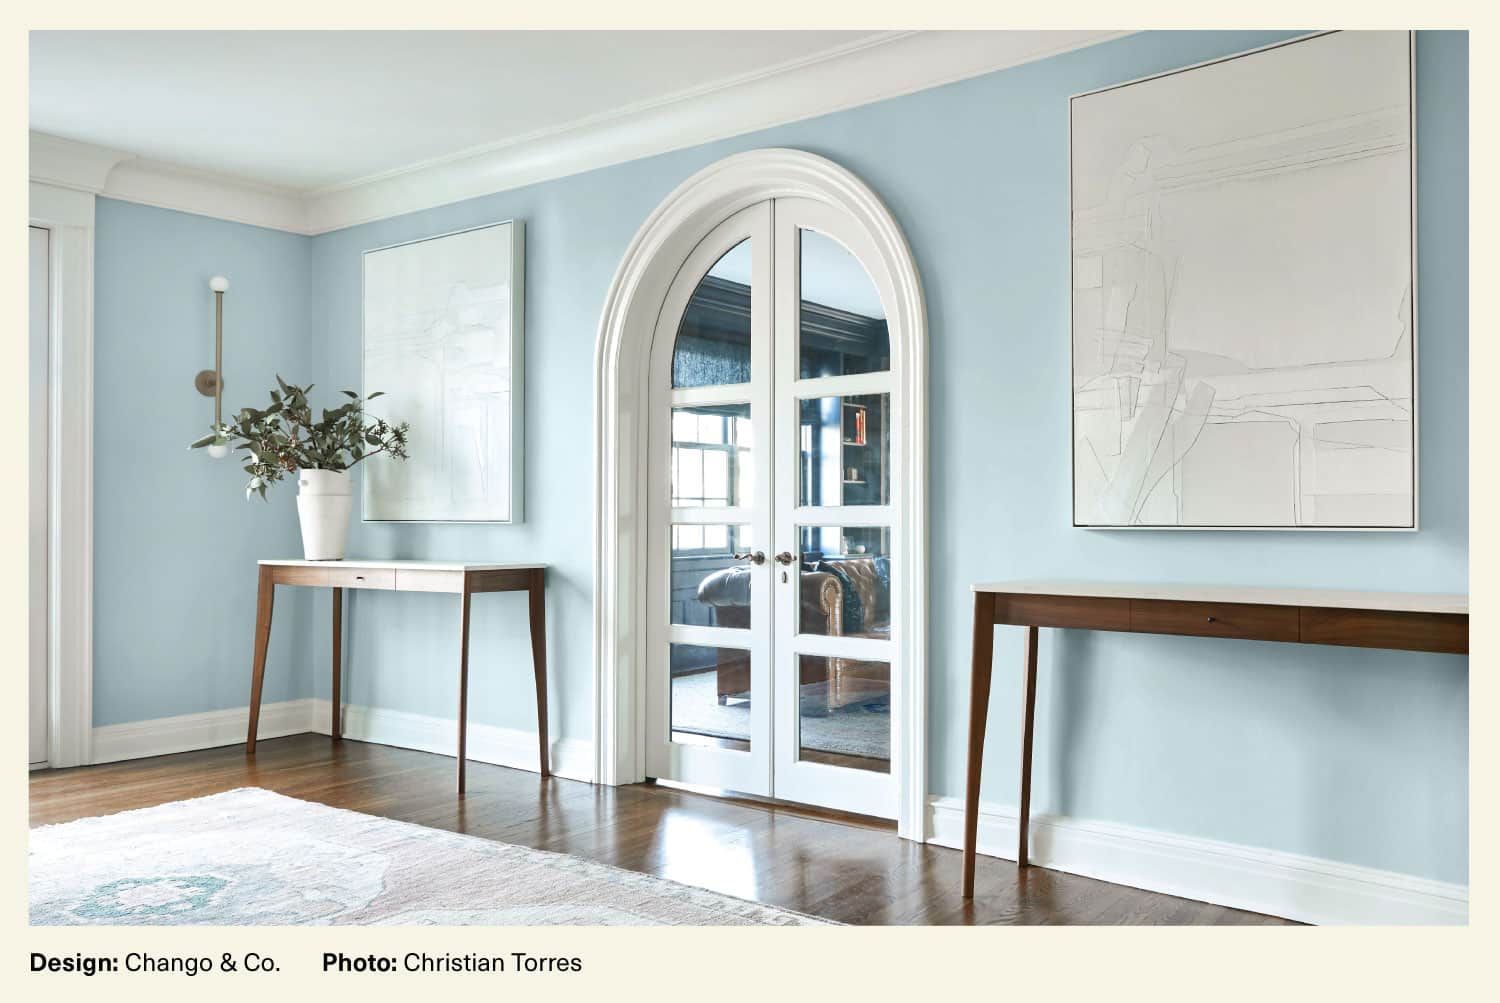
Smaller areas, like those between windows and doors, are the perfect places to display your more petite pieces. These can also be deployed in a cluster as a gallery wall.
Hanging isn’t the only way to display your artworks. You can stand framed pieces and stretched canvases on an easel, a mantelpiece, floating shelves or on the floor leaning against a wall. This creates a casual look and also allows you to change your arrangements more easily and without damaging the wall.
Asked how they decide where to hang art, Gabriela Gargano and Kyle McVey, partners in Manhattan design firm Grisoro Studio, explain, “We typically begin a project by reviewing any furniture and art a client already owns and wishes to incorporate into their home. As we work through the furniture layouts and design, we’ll review art — existing and future pieces — for color, medium and scale. This allows us to truly incorporate art into our designs, instead of trying to place it at the end. We believe this creates an authentic and artful home where each piece is highlighted in a beautiful way.”
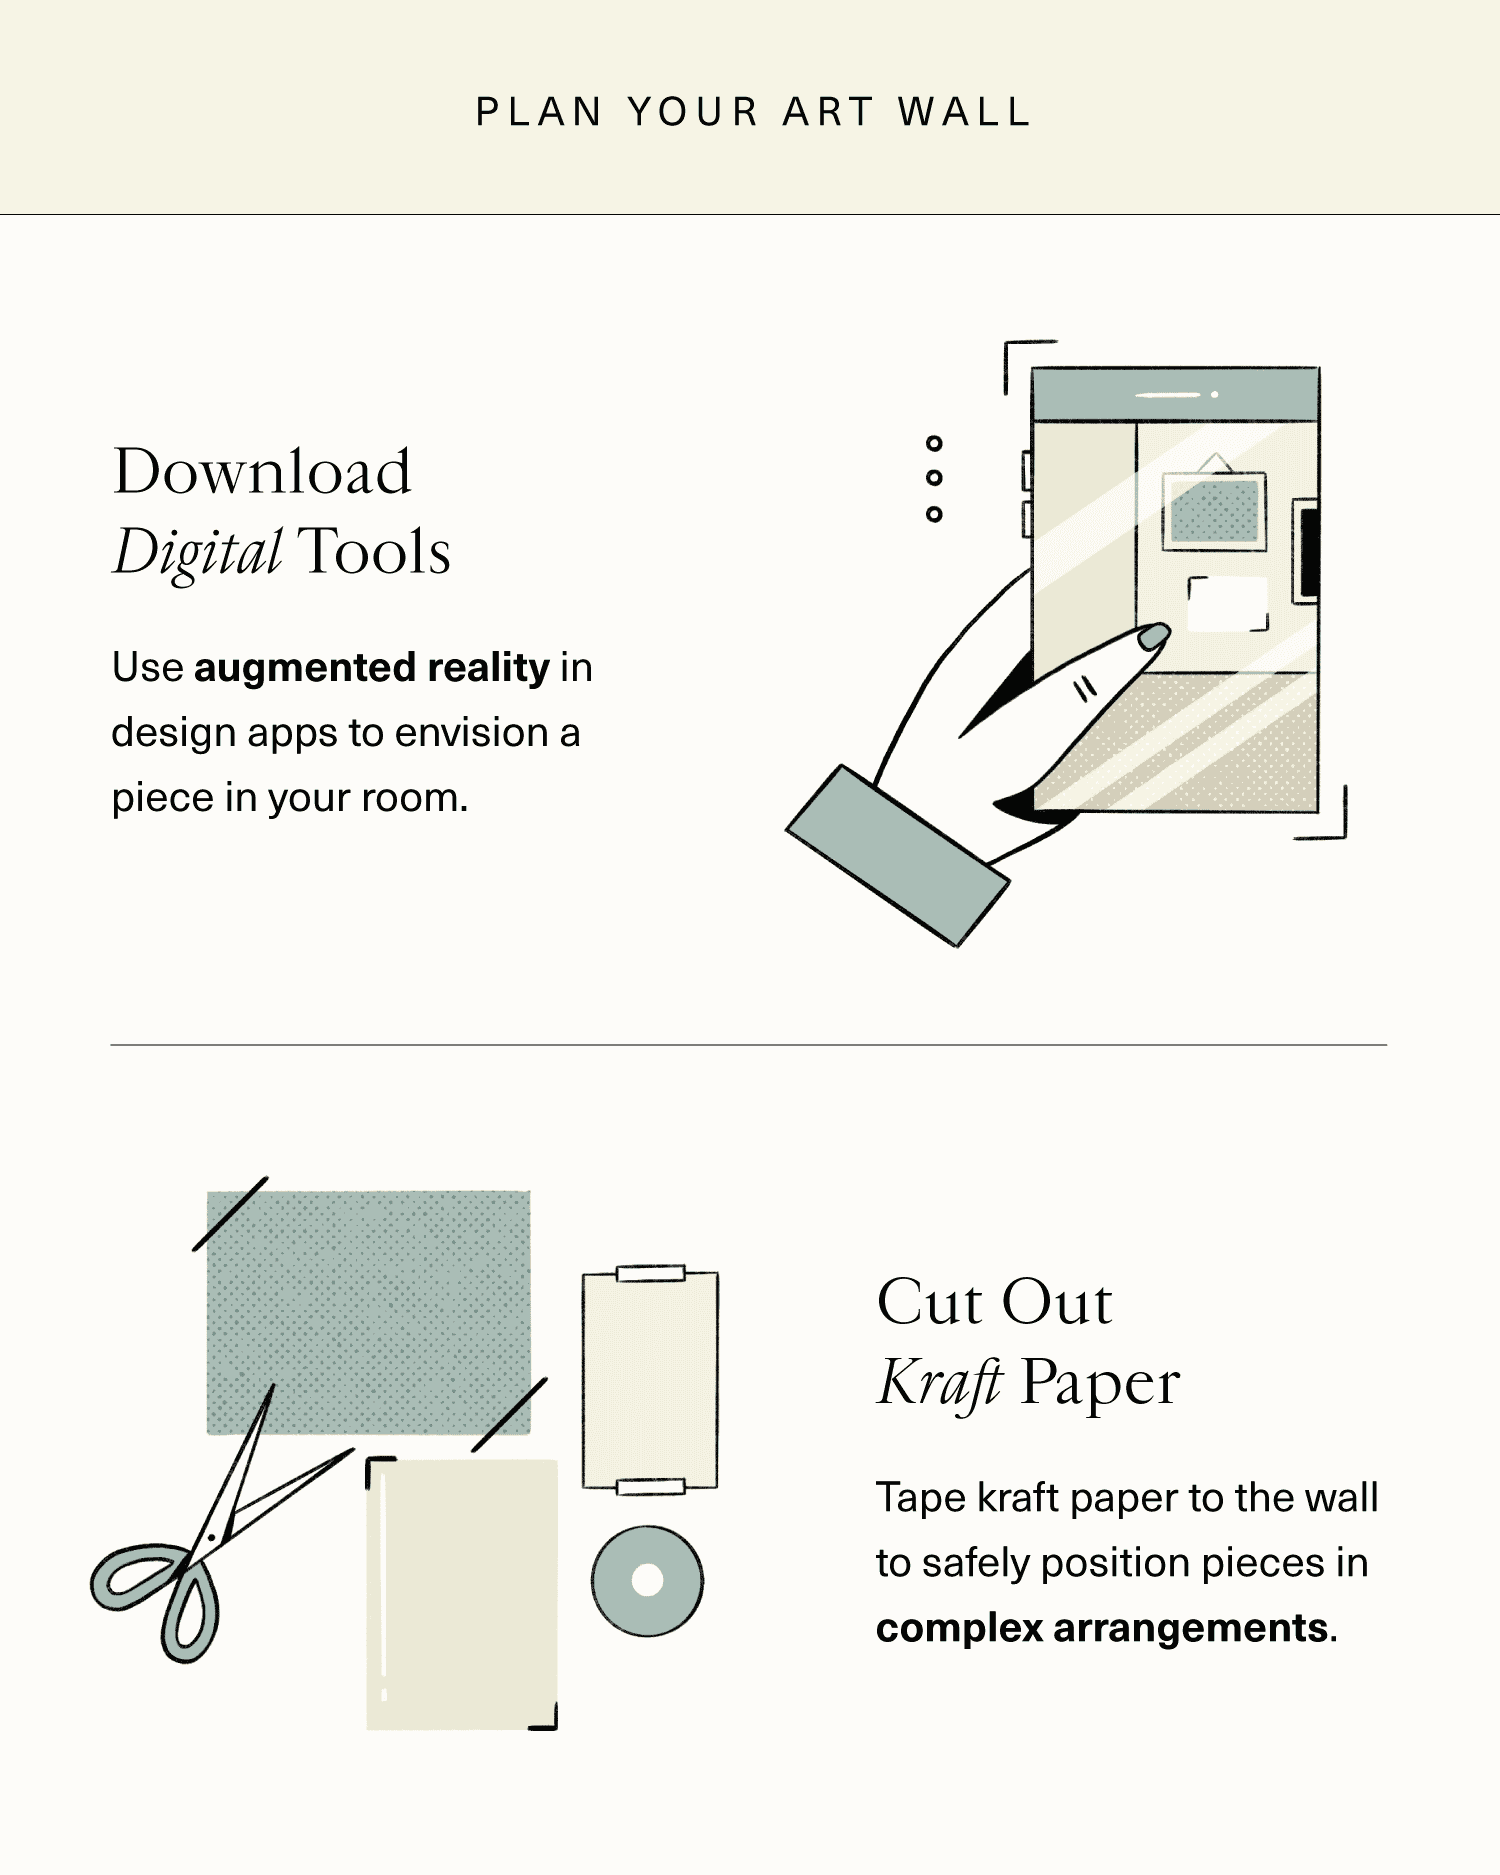
2. Make a Plan
Before you pull out the hammer or drill, you should plan how you will arrange your works. You can do this using digital tools or low-tech methods, such as kraft paper and tape.
The 1stDibs app includes a handy “View on Wall” feature that allows you to see how a particular artwork will look on a particular wall. Using your phone’s camera, it maps the surface you’re considering, then shows you what the work will look like there at the proper scale. This is great for envisioning how a piece will fit into your overall design before you purchase it.
For a complex arrangement involving pieces of different sizes, you’ll want to see how it looks before putting any nails in your wall. One easy way is to lay out the works you want to display on the floor.
You can go a step further and visualize the pieces directly on your wall by making templates of them. Trace the works’ outlines on kraft paper and cut them out. Then, tape the cutouts to the wall with painter’s tape in various arrangements, stepping back to see how each looks.
When you find an arrangement you like, use the cutouts to mark where on the wall each work will go. Now, you can hammer in the nails with confidence.
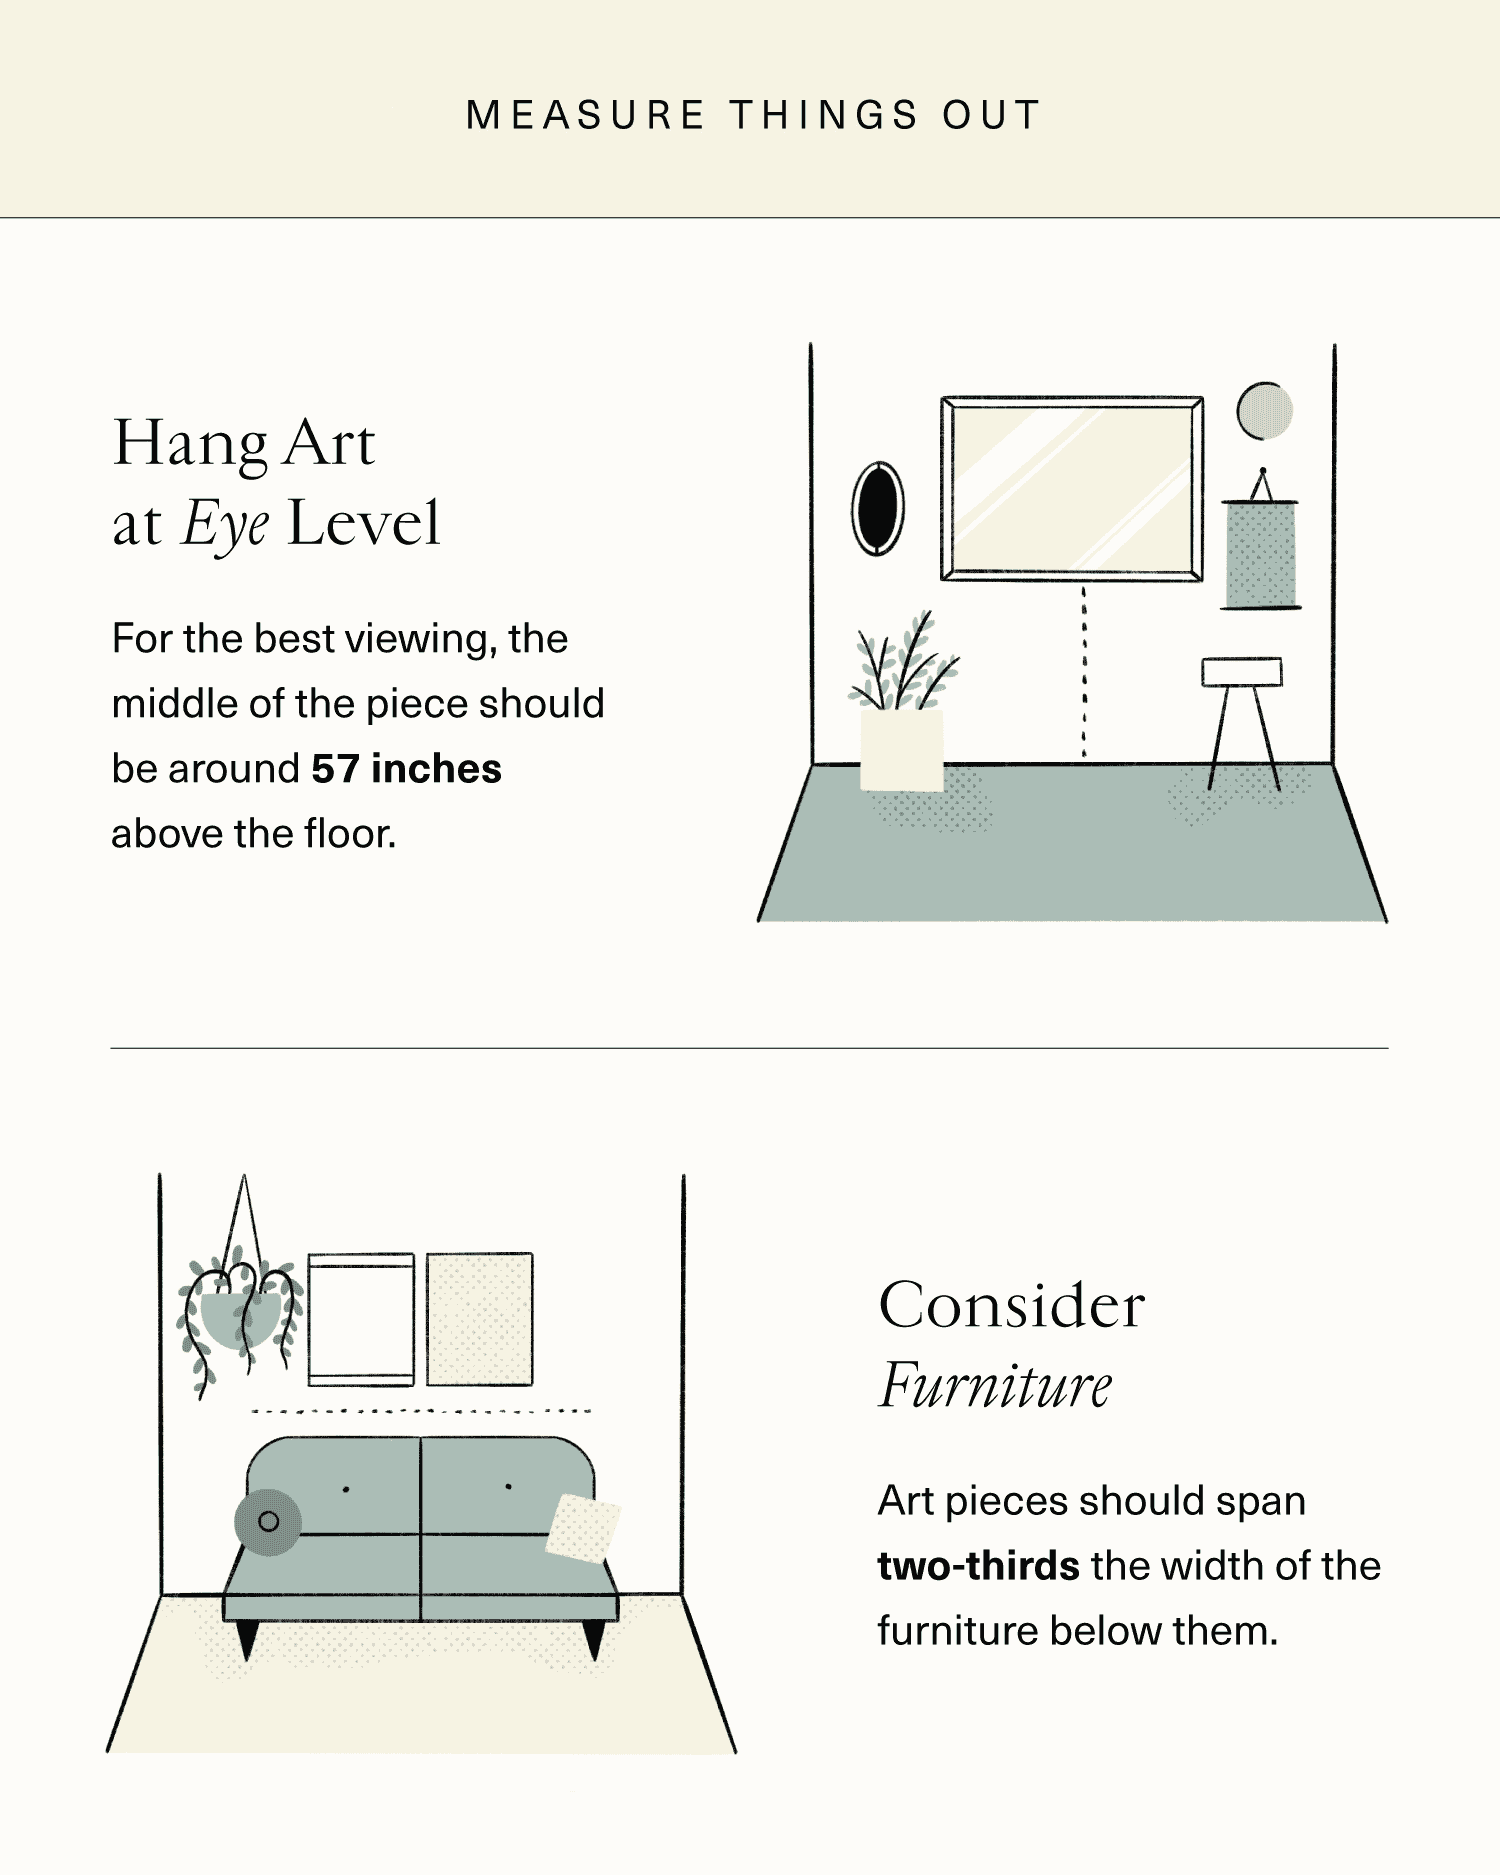
3. Hang Art at Eye Level
A good rule is to hang an artwork so that its center is at eye level, for easy viewing. Eye level, on average, is 57 to 60 inches off the ground.
You may want to hang your works lower if the room has a low ceiling, or in a living room, because its occupants are often sitting, so their eye level isn’t as high.
4. Consider the Furniture
Art can add interest to a sofa, console table, sideboard or bed. So, what should you consider when hanging artworks above furniture?
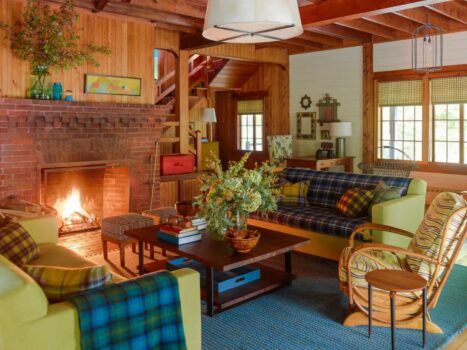
From an aesthetic standpoint, an art arrangement should usually be no wider than the piece of furniture it hangs over. In the case of a sofa, it should span an area two-thirds the width of the piece and start about 8 to 10 inches above it.
There are also practical considerations.
“I recommend leaving enough space above the piece of furniture to allow for usable workspace and to protect the art from other items damaging it,” says Susana Simonpietri, of Brooklyn home design studio Chango & Co. “For example, if the art is to hang above a bench or a sofa, I think about the head height of the client when seated. When arranging above a console or dining buffet, I think about space for flowers or even food. When placing art above an area that will likely have hot items underneath and around it, I’ll consider the steam and how it might affect the piece over time.”
Tips for Arranging Wall Art
When deciding how to arrange art on a wall, there are lots of factors to consider: the surface, the spacing and the tools needed, to name a few. Below, we provide pointers to help you decide on the right layout, achieve visual balance, choose and pair artworks, hang on different types of walls and more.
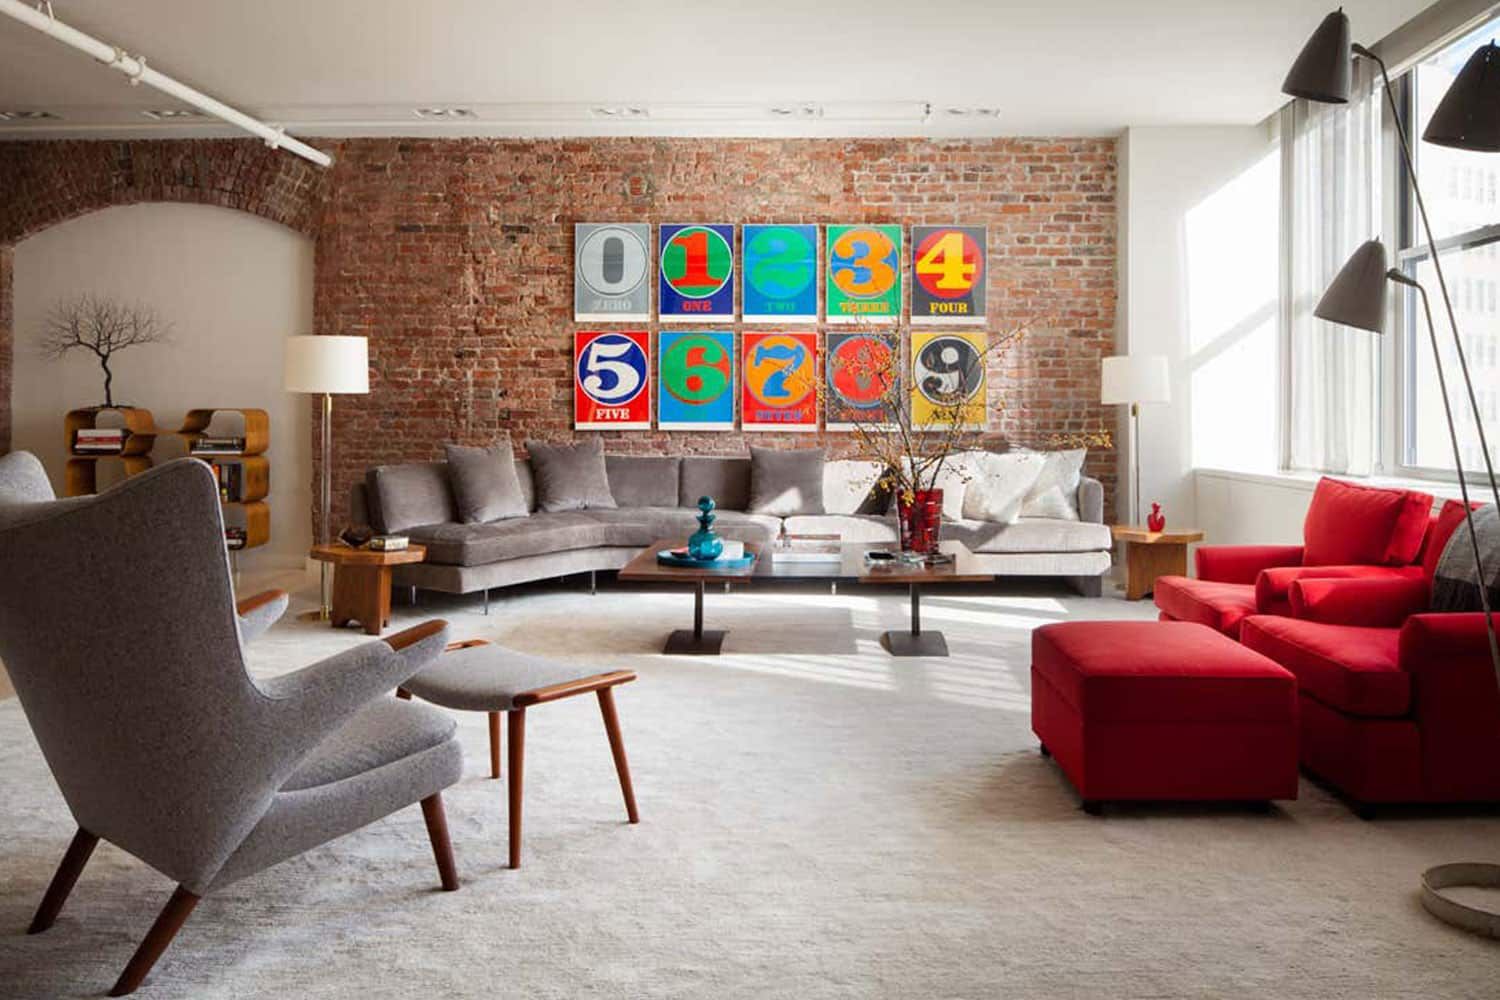
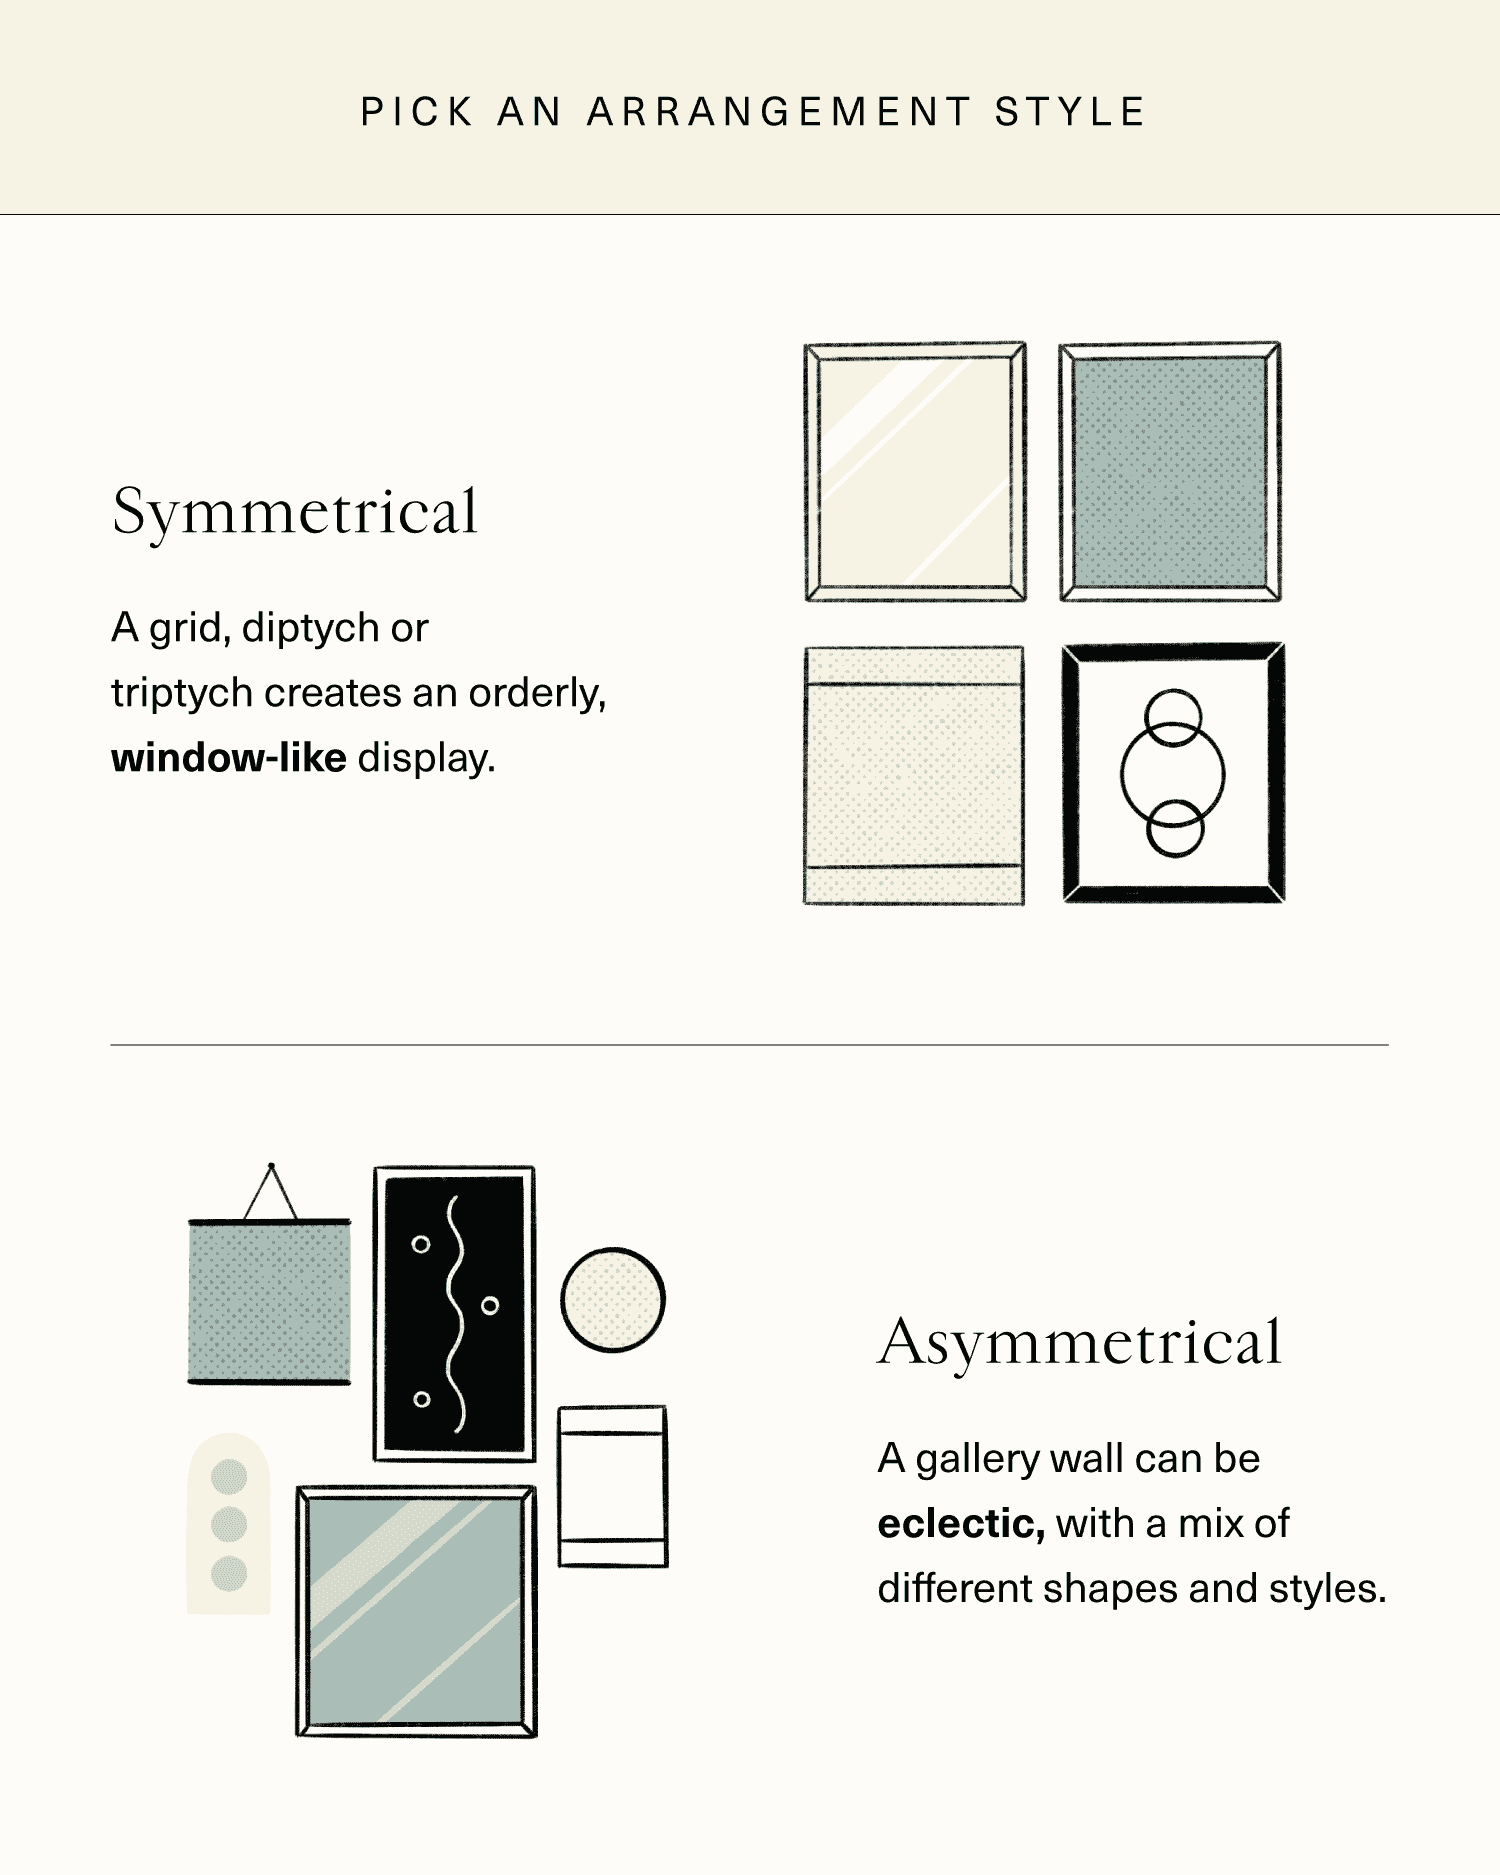
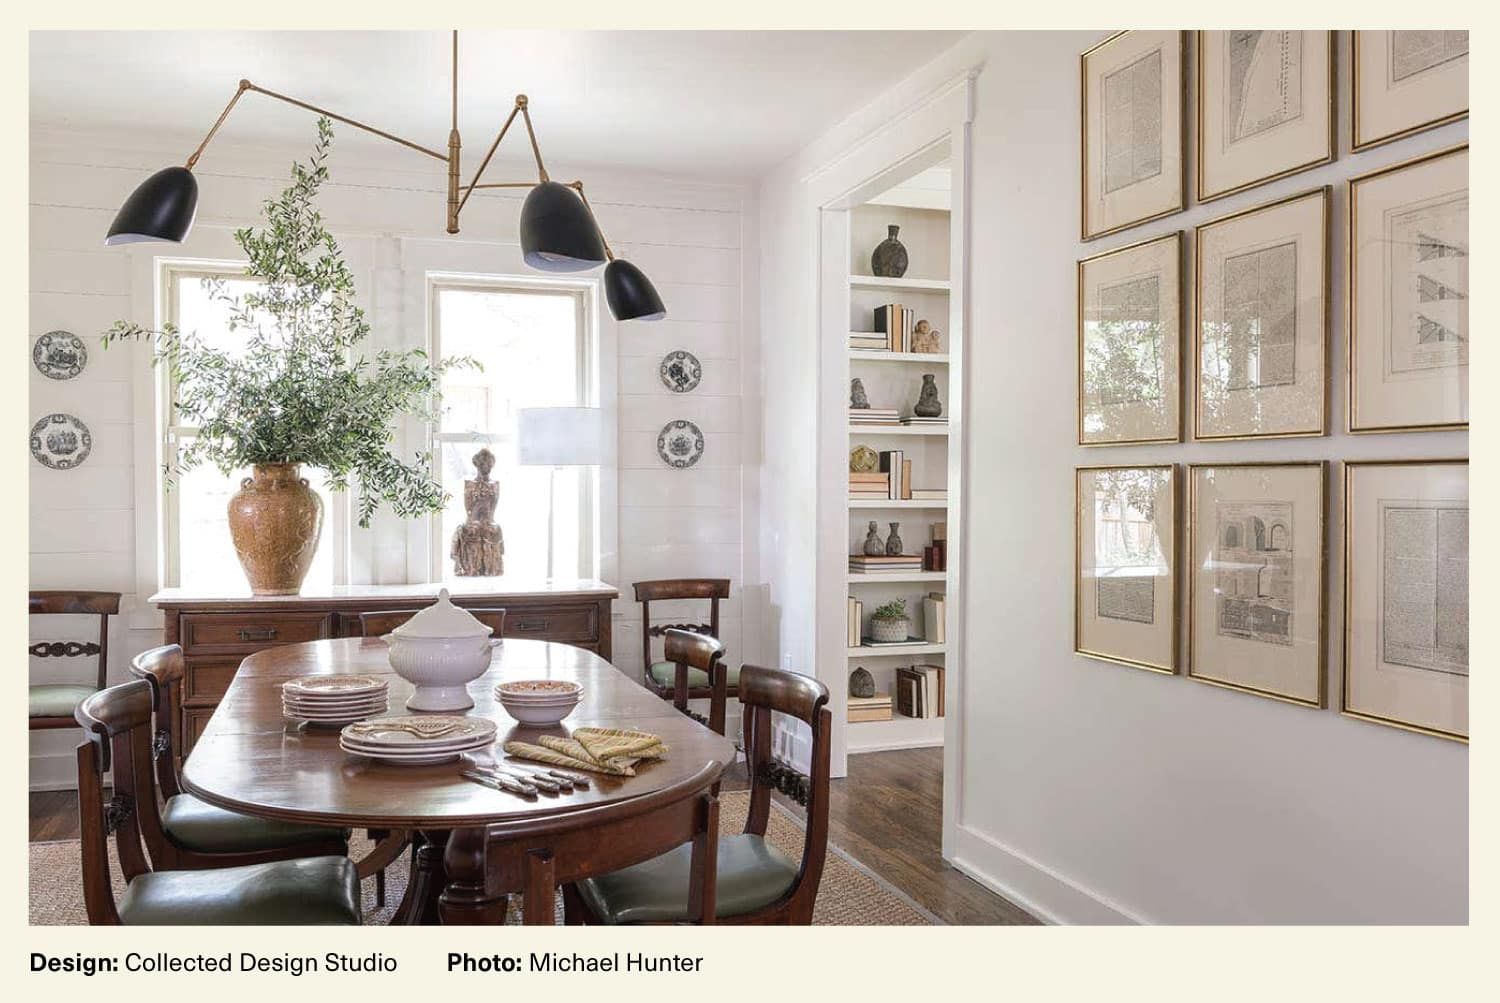
Symmetrical Wall Arrangements
A symmetrical wall arrangement is traditional, formal and orderly. It may comprise a grid of four to six pieces or, for an odd number of works, a horizontal row. The spaces between the pieces need to be nearly identical, and it works best if the pieces are all the same size and have identical frames.
Such arrangements are perfect for over furniture or lining a hallway.
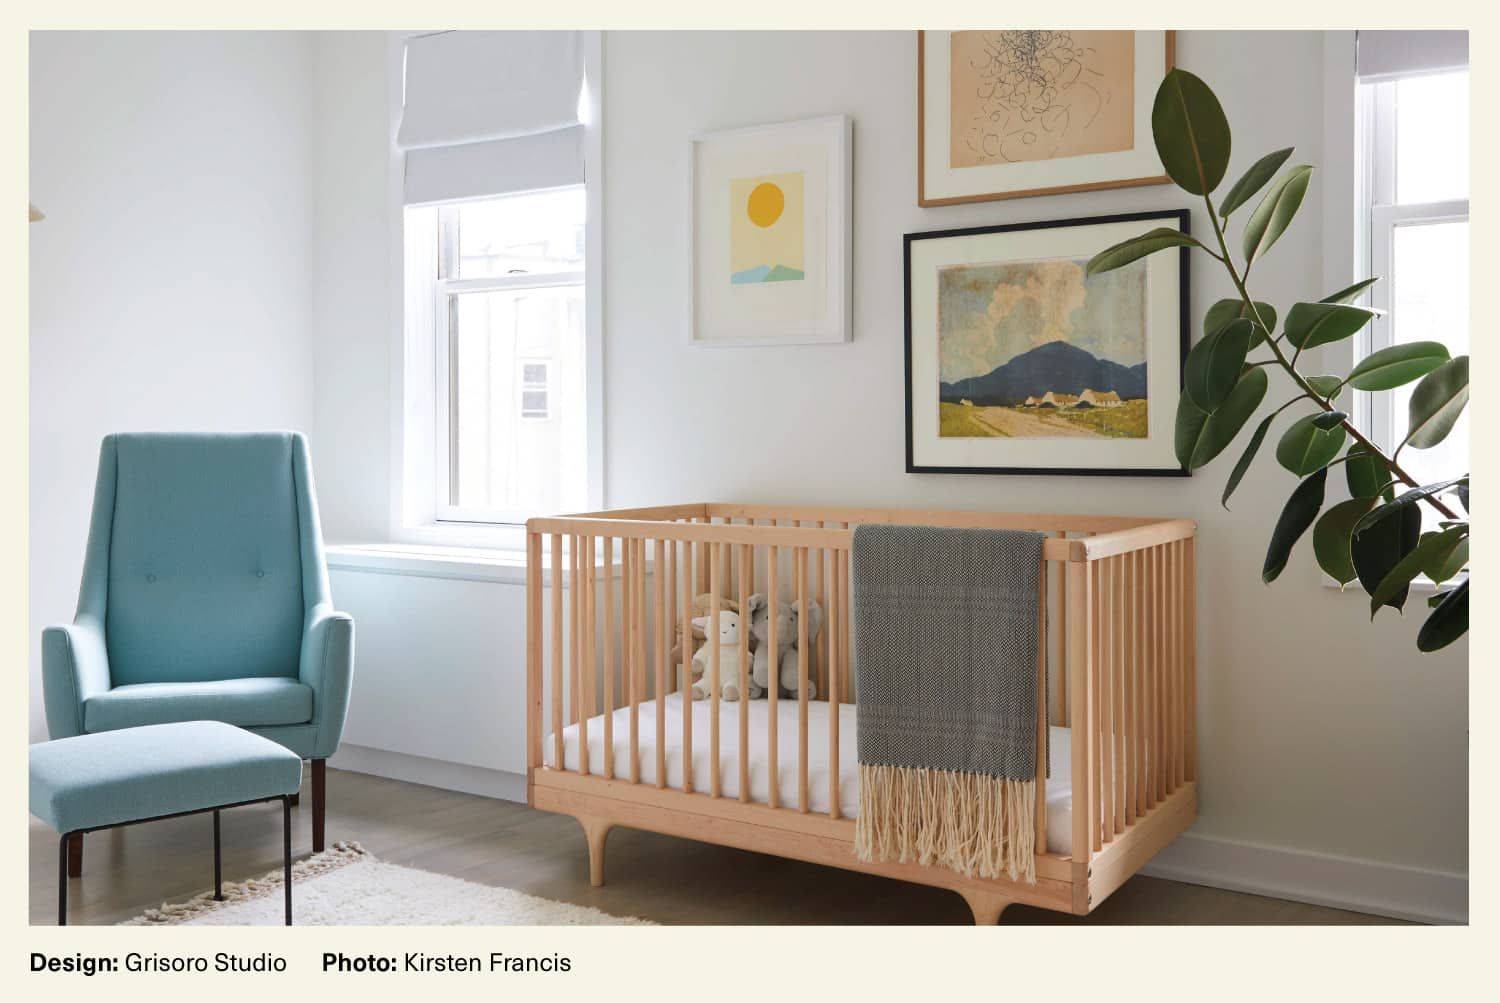
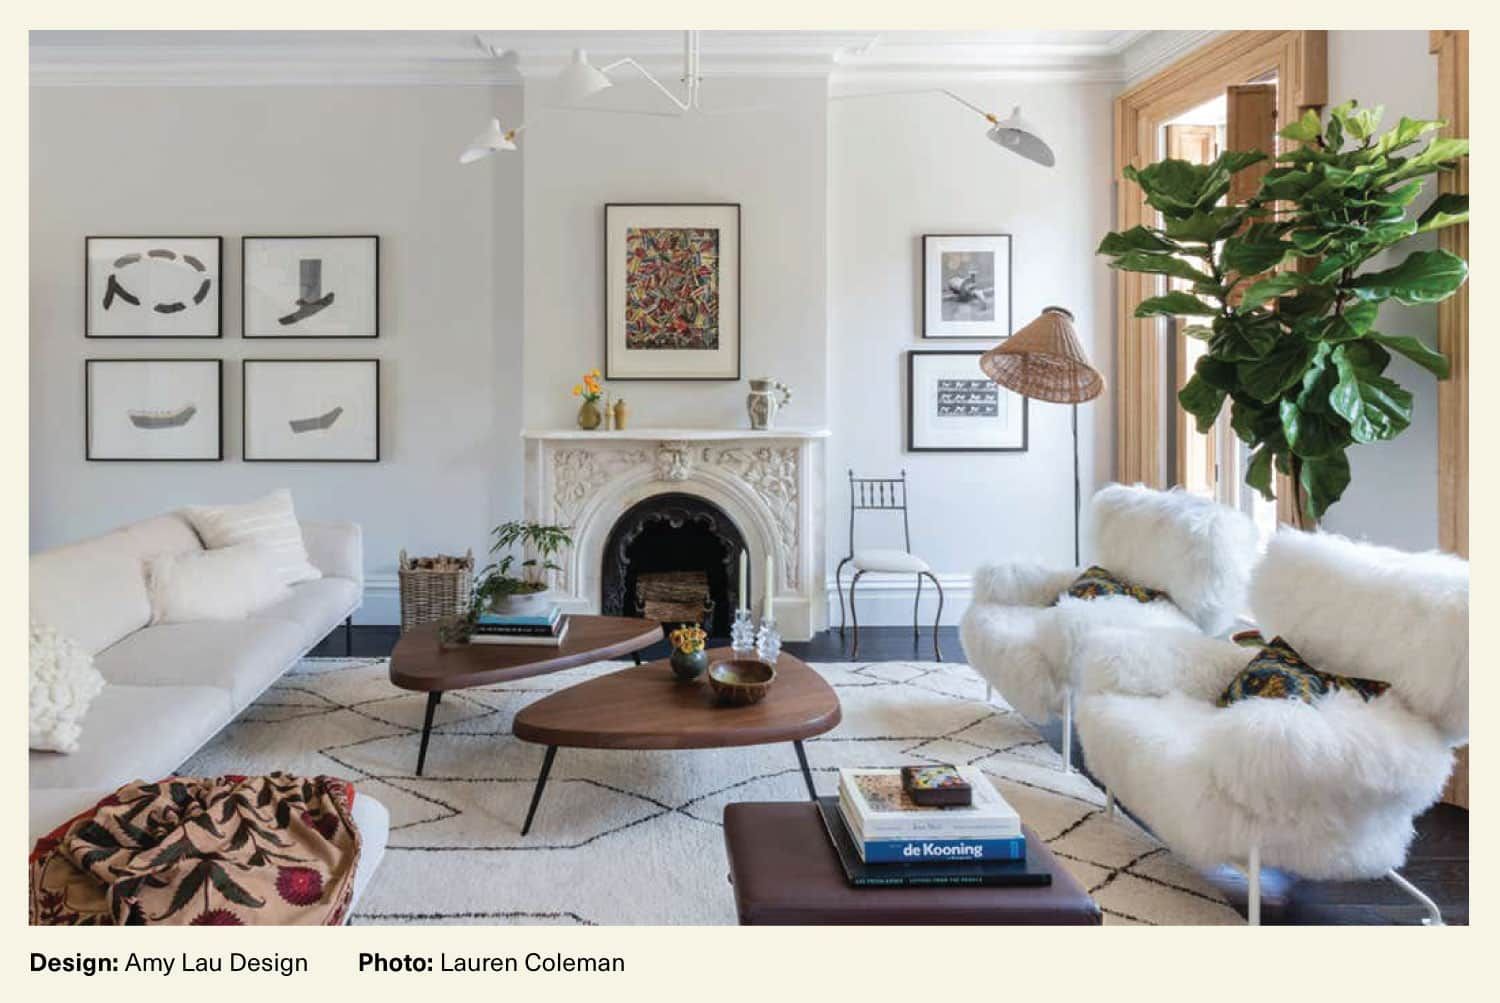
Asymmetrical Wall Arrangements
Asymmetrical arrangements have a more collected and eclectic feel. They may be small clusters of art or large, salon-style gallery walls. Both approaches enable you to mix pieces of different sizes, styles and orientations, as well as frames of different types and widths.
A gallery wall also presents the opportunity to intersperse paintings, photographs and prints with such items as wall sculptures, baskets, plates, mirrors and sconces.
These less-structured arrangements allow more room for creativity, but it can be difficult to maintain visual balance.
The Grisoro Studio partners remind us that size isn’t the only factor to consider when striving for harmony on a wall: “Texture, color and style are as important as size. Reviewing the visual weight of the furnishings and art, on their own and as parts of the full room, allows us to create balance.”
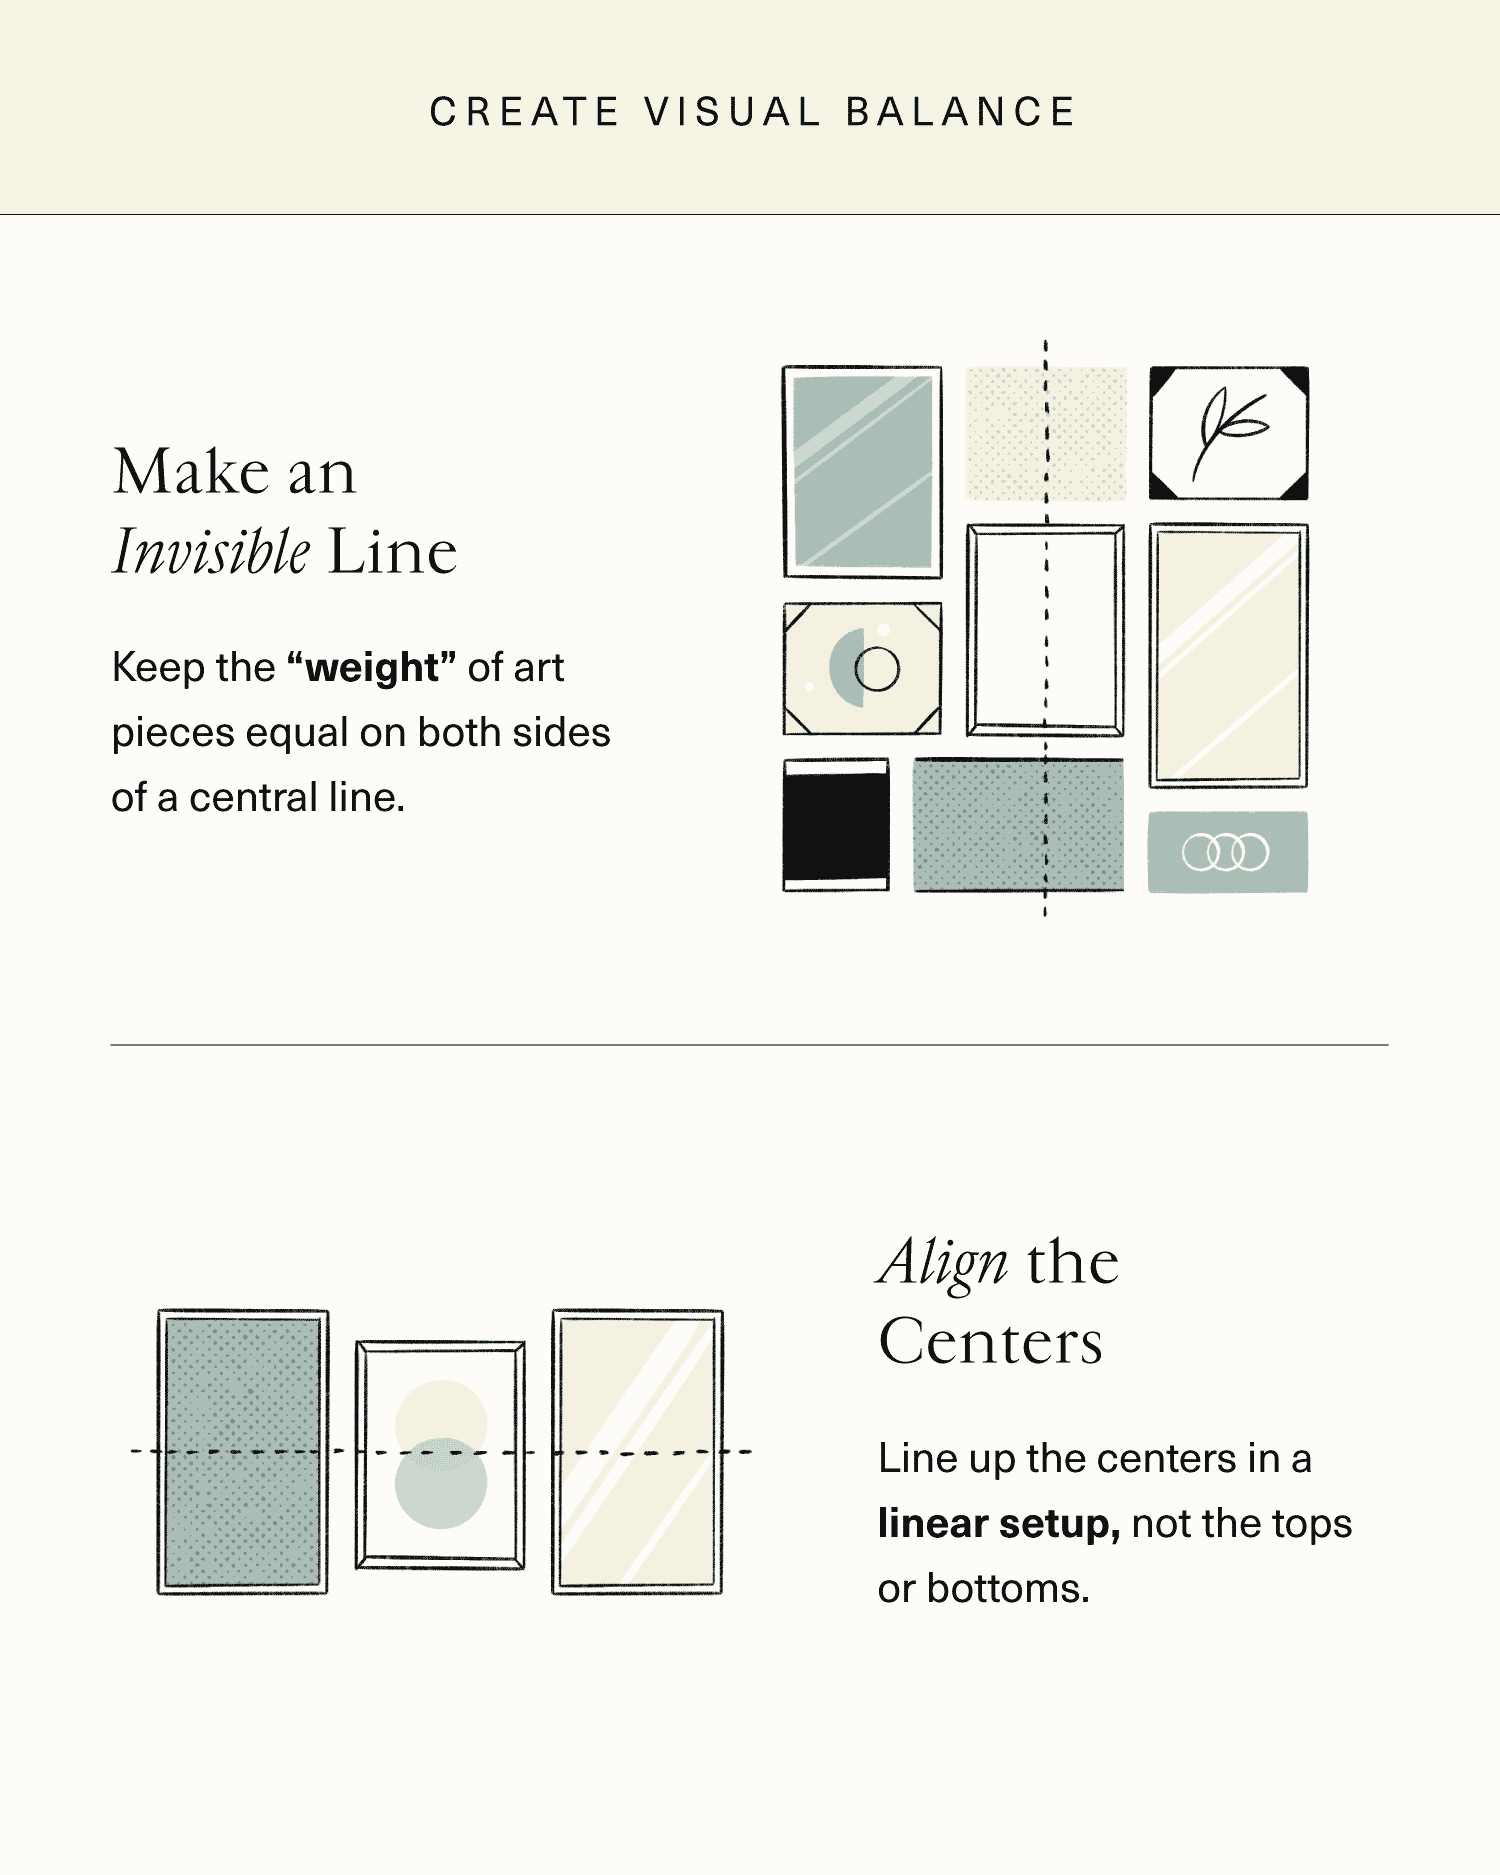
Creating Visual Balance
To maintain a pleasing balance in an arrangement composed of artworks of varying sizes, draw an invisible line in the middle of the wall or in the area you’re covering and make sure you don’t put too much “weight” on either side of it.
Hang the largest, most prominent pieces first, either in the center or near the bottom of the arrangement, to create a focal point. Then, add smaller pieces, working outward. The arrangement can be expanded over time as your collection grows.
To keep it cohesive, try to repeat a certain color or style at least once.
Choosing and Pairing Art Styles for a Gallery Wall
When buying art for your home, choose pieces that you connect with. If you’re shopping online, read the work’s description to learn about the artist and check the price and shipping information.
Make sure that the works you choose complement or relate to your overall theme and furniture style. Artworks can either fit into your room’s color scheme or serve as accent pieces.
Pairing art is where you can get creative. As New York designer Amy Lau explains, “Pairing different styles of art is a matter of finding some sort of rhythm within those different styles. Perhaps the artworks are monochromatic or complementary in color, perhaps they are the same size, or perhaps they are all mounted in a similar way with the same frame.”
Try to pick pieces that cohere in some way, whether with respect to color, style or subject matter. For example, you might combine fine-art prints with black-and-white photographs. Or you might make a statement by juxtaposing works in different styles, such as a bold piece of Pop art and an antique painting.
Spacing Wall Art
When hanging wall art, it can be difficult to eyeball the spacing between pieces, so you’ll need to use a measuring aid. That said, how far apart should you place the works?
“To add interest to a space, I like to play with different widths between artworks, typically between three inches and six inches, depending on the works, the width of the wall and the ceiling height,” says Lau. “If the artworks are the same size, it can be very impactful to create a grid with the same distance between all the pieces, both to the sides and above and below.”
Go with what feels right for the wall, but here are some spacing suggestions for different layouts:
- Grid layout: Leave three to four inches between frames to keep the arrangement tight.
- Triptych layout: Leave four to six inches for more breathing room.
Including Photos in a Gallery Wall
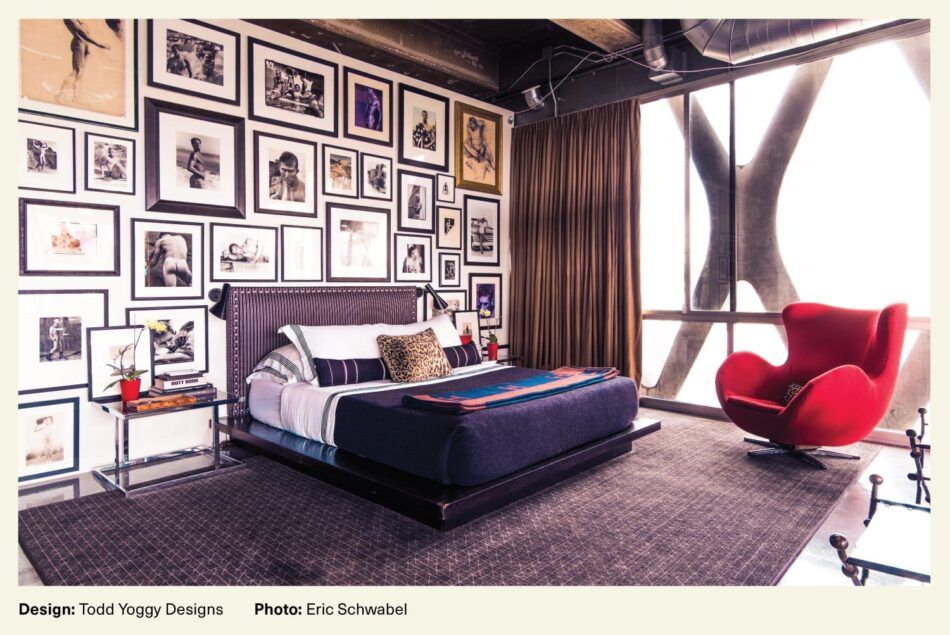
Gallery walls needn’t be limited to paintings and prints; they are a great way to display photographs as well. Designer Todd Yoggy created an impressive contemporary-photo gallery wall in his Los Angeles loft (pictured above). “Being a collector of photography, I found it difficult to hang in a traditional way and enjoy all my collection,” he explains. “Hanging salon-style allows me to do just that.”
You can also display family and newly purchased photos alongside pieces in other mediums in a gallery wall. Here are some tips for creating a harmonious mix.
Choose photos with the same general palette as the other artworks.
Black-and-white photos work especially well with drawings and etchings in the same hues, but they can also be incorporated in other color schemes.
Use a wide mat frame for family photos. This will make them feel like framed artworks and help them fit into the gallery wall.
Tips for Hanging Art on Different Surfaces
How you hang a work will depend on its weight and the type of wall where it will be displayed. Here are some general guidelines:
Drywall on a stud: Slide a stud finder along the area where you want to hang your artwork, and mark the edges of the studs it locates. Then, decide which stud is in the best place, and hammer your picture hanger into it.
Drywall with no stud: Use an anchor and a screw instead of a picture hanger. The anchor bites into the drywall and secures your art in place.
Concrete or masonry walls: With these surfaces, the process is a bit more intensive. For a heavy picture, use a hammer drill with a masonry bit to make a hole in the wall that can hold a masonry screw, or use a wall anchor and screw.
Now that you’ve read our tips, check out the complete visual guide on arranging wall art below.

Hopefully, these guidelines have made you feel more confident about arranging wall art to enhance your living space. But bear in mind, these are not hard and fast rules.
Above all, the arrangement you create should feel natural and meaningful. For more home decor inspiration, check out our huge selection of decorative objects on 1stDibs.